A glimpse into my Go-To setup: Deploy a Promox CEPH HCI cluster

In this post, I will show you my basic go-to setup when a client asks my company for a robust virtualization solution. We often turn to a Proxmox CEPH HCI cluster, a configuration that has consistently delivered excellent results in terms of scalability, reliability, and cost-effectiveness. This setup is our starting point for building customized solutions that meet specific client needs, combining ease of management with powerful performance.
In deploying my go-to virtualization setup, I typically employ the following configuration to ensure both performance and resilience:
Three Proxmox Nodes: These are the backbone of the cluster, providing the necessary redundancy and load balancing to handle virtual machines and containers efficiently Using three nodes allows us to build a robust environment with high availability and failover capabilities.
One TrueNAS Node: For reliable and scalable storage, I incorporate a dedicated TrueNAS node. This setup offers excellent data protection features and is critical for storage-intensive applications, ensuring data integrity and easy management.
One or more 10Gb Switches: Network speed and bandwidth are crucial for high-performance virtual environments. Deploying 10Gb switches enables swift intra-cluster communication and efficient data transfer, reducing bottlenecks and improving overall network performance. For our CEPH storage within the Proxmox environment, network performance is not just a benefit—it’s a necessity. CEPH relies heavily on network speed for replication and data distribution across the cluster. This is why we ensure that each deployment includes at least one 10Gb switch. High-speed switches are crucial for maintaining swift and seamless access to storage, significantly enhancing both the performance and reliability of the CEPH cluster. By integrating 10Gb or higher network infrastructure, we effectively minimize latency and maximize throughput, which is essential for the demanding workloads and large data volumes handled by CEPH.
One or More pfSense Appliances: To manage network security and routing, pfSense appliances are integral. These provide robust firewall protection, VPN capabilities, and advanced routing features to secure and optimize network traffic.
This configuration has proven effective across various deployments, offering a solid foundation for scalable and secure virtualization solutions tailored to meet the diverse needs of our clients.
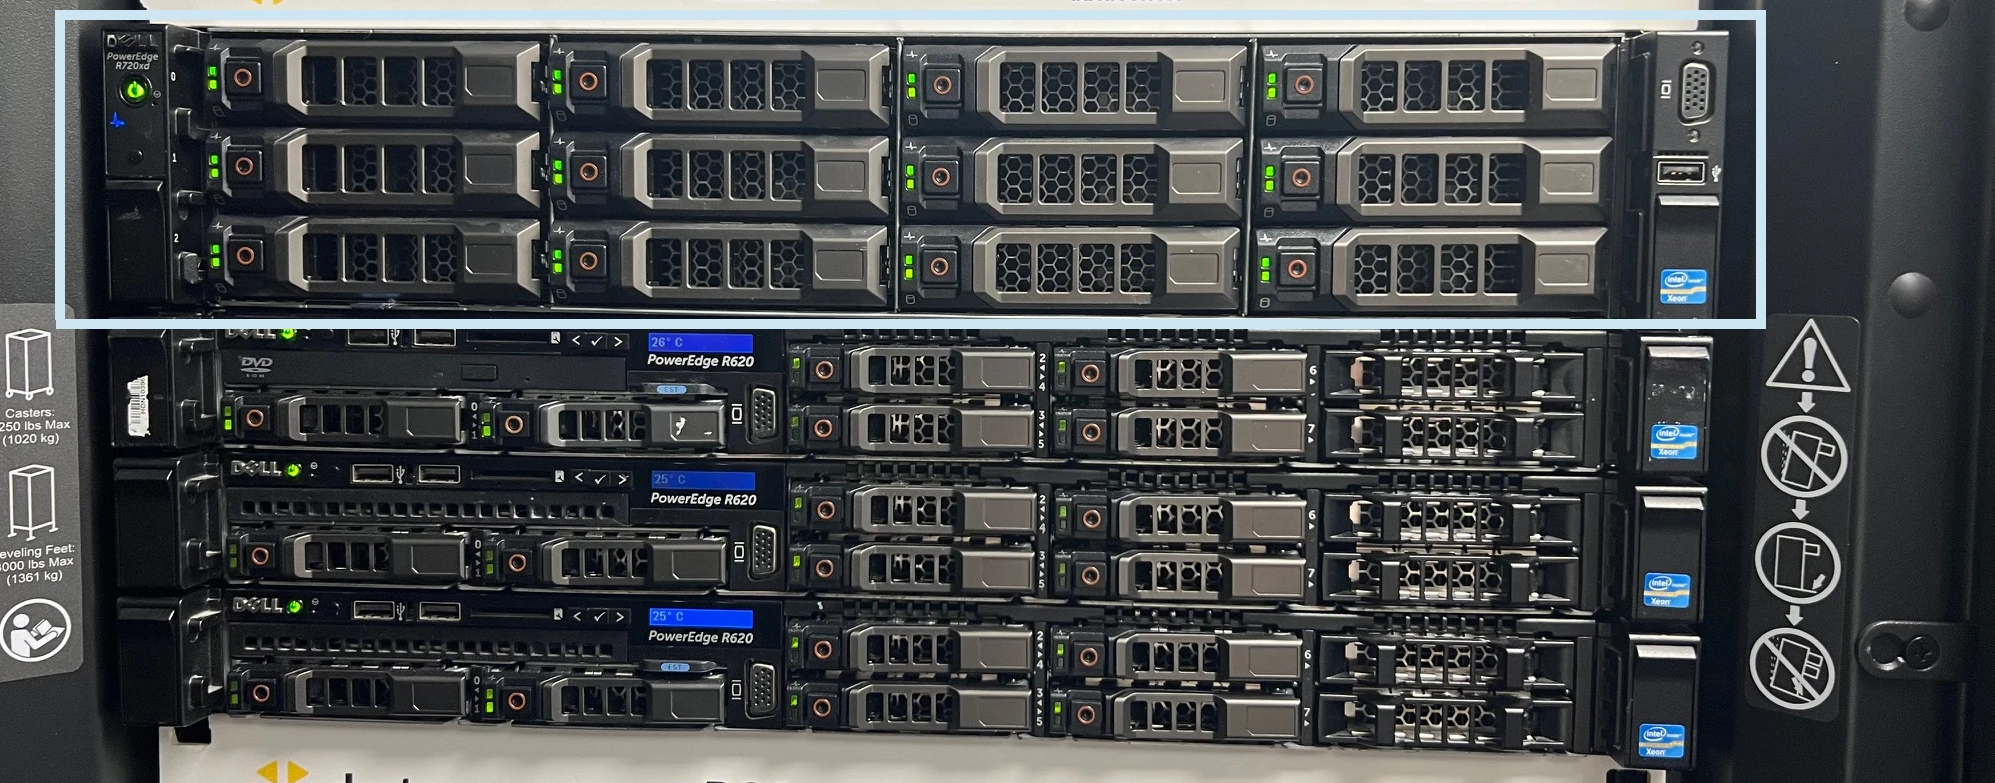
Proxmox nodes
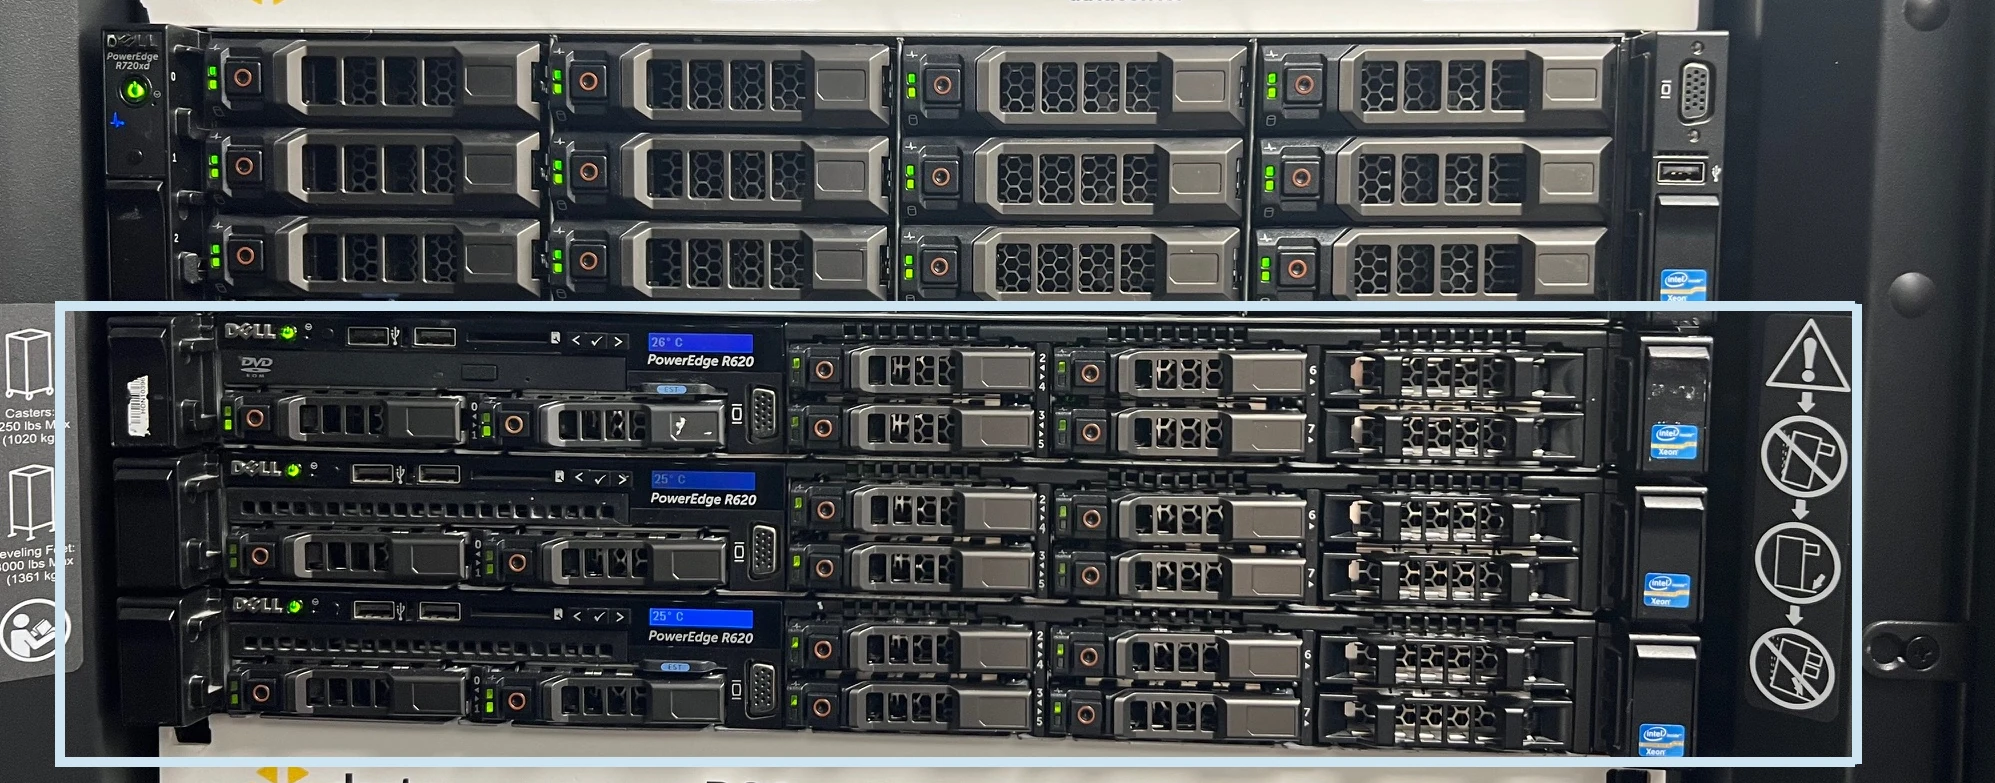 We utilize a minimum of three Proxmox nodes in our CEPH HCI cluster to meet the quorum requirements of Corosync, the cluster engine. This setup is critical to avoid “split-brain” scenarios, where the cluster’s integrity could be compromised due to inconsistent data among the nodes. With three nodes, the cluster can maintain a majority vote on the state of the cluster, ensuring consistent operation and data integrity, even if one node goes offline.
Overview
 As you can see we have plenty of resource in this cluster. In this cluster we have 40 CPUs and 128 Gb RAM per node.
Disks
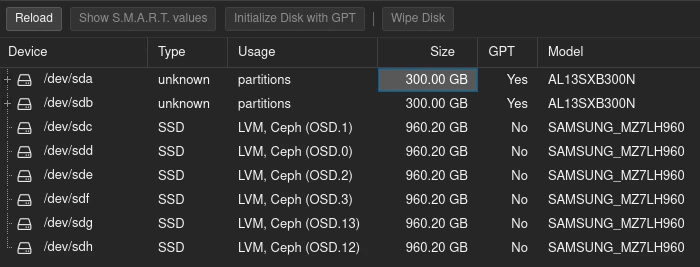
Each node in our cluster has the same amount of disks and the same disk sizes. In this cluster each node has 2x 300Gb SAS disks for the operating system and 6x 960Gb SATA SSD disks for CEPH storage.
Storage and Backup

There are different storage types attached to each node. The most important one is the Proxmox Backup Server; this allows us to take backups of the VMs and containers running on the cluster. The Proxmox Backup Server is hosted on the TrueNAS node. We also have the REPO NFS share on the nodes, where we store all the ISOs and images needed to install virtual machines. This is also managed on the TrueNAS node. And offcourse, we utilize our CEPH SSD storage along with CephFS.
Network
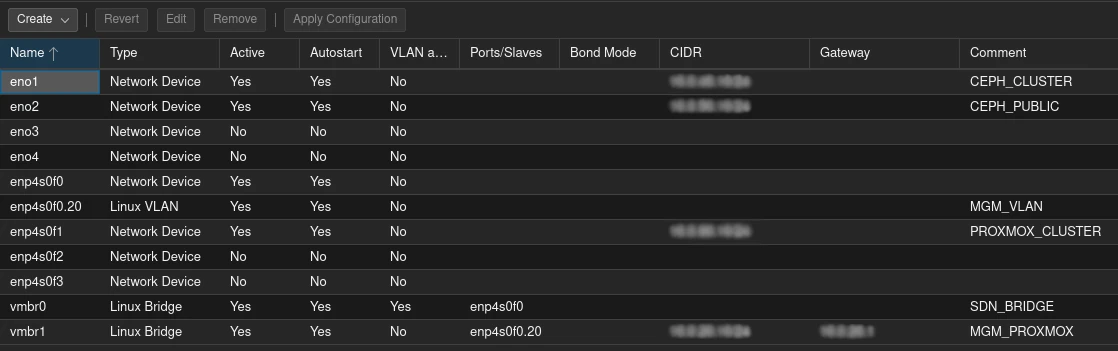
The network configuration must be same on all nodes, espacially for the SDN bridge. As we utilize CEPH we need, at least, 10Gb netword NICs. You can see we have a CEPH_CLUSTER and CEPH_PUBLIC network. These are connected to 10Gb and are non-routable VLANS on the switch.
We also have our MGM_VLAN, this is purely to access the Web GUI of Proxmox. This is connected to our MGM VLAN accross the network.
Then we have our PROXMOX_CLUSTER network that us only used for cluster traffic and is also a non-routable VLAN.
And the most important bridge for our VMs / Containers is the SDN_BRIDGE (Software Defined Network).
TrueNAS node
 For storage external to the Proxmox cluster, we use TrueNAS Scale. We opt for Scale specifically because it allows us to run VMs directly on it. In this setup, we install one VM on TrueNAS that runs the Proxmox Backup Server. This configuration enables us to directly attach the storage from the TrueNAS pool to the Proxmox Backup Server, streamlining our backup process.
 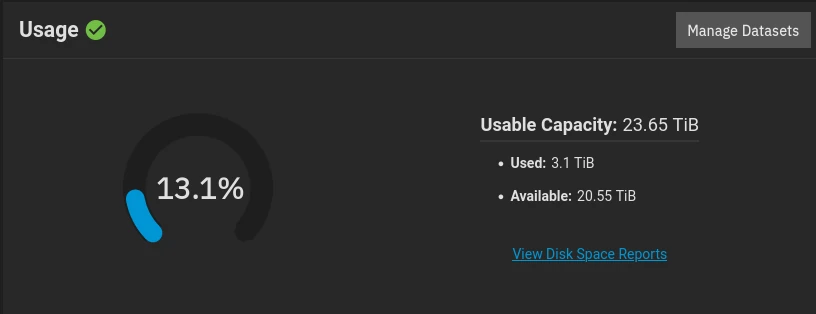 In this node we have 12x 3TB SAS disks that gives us a total of 23TB space with ZFS RAIDZ3 config.
10Gb Switch
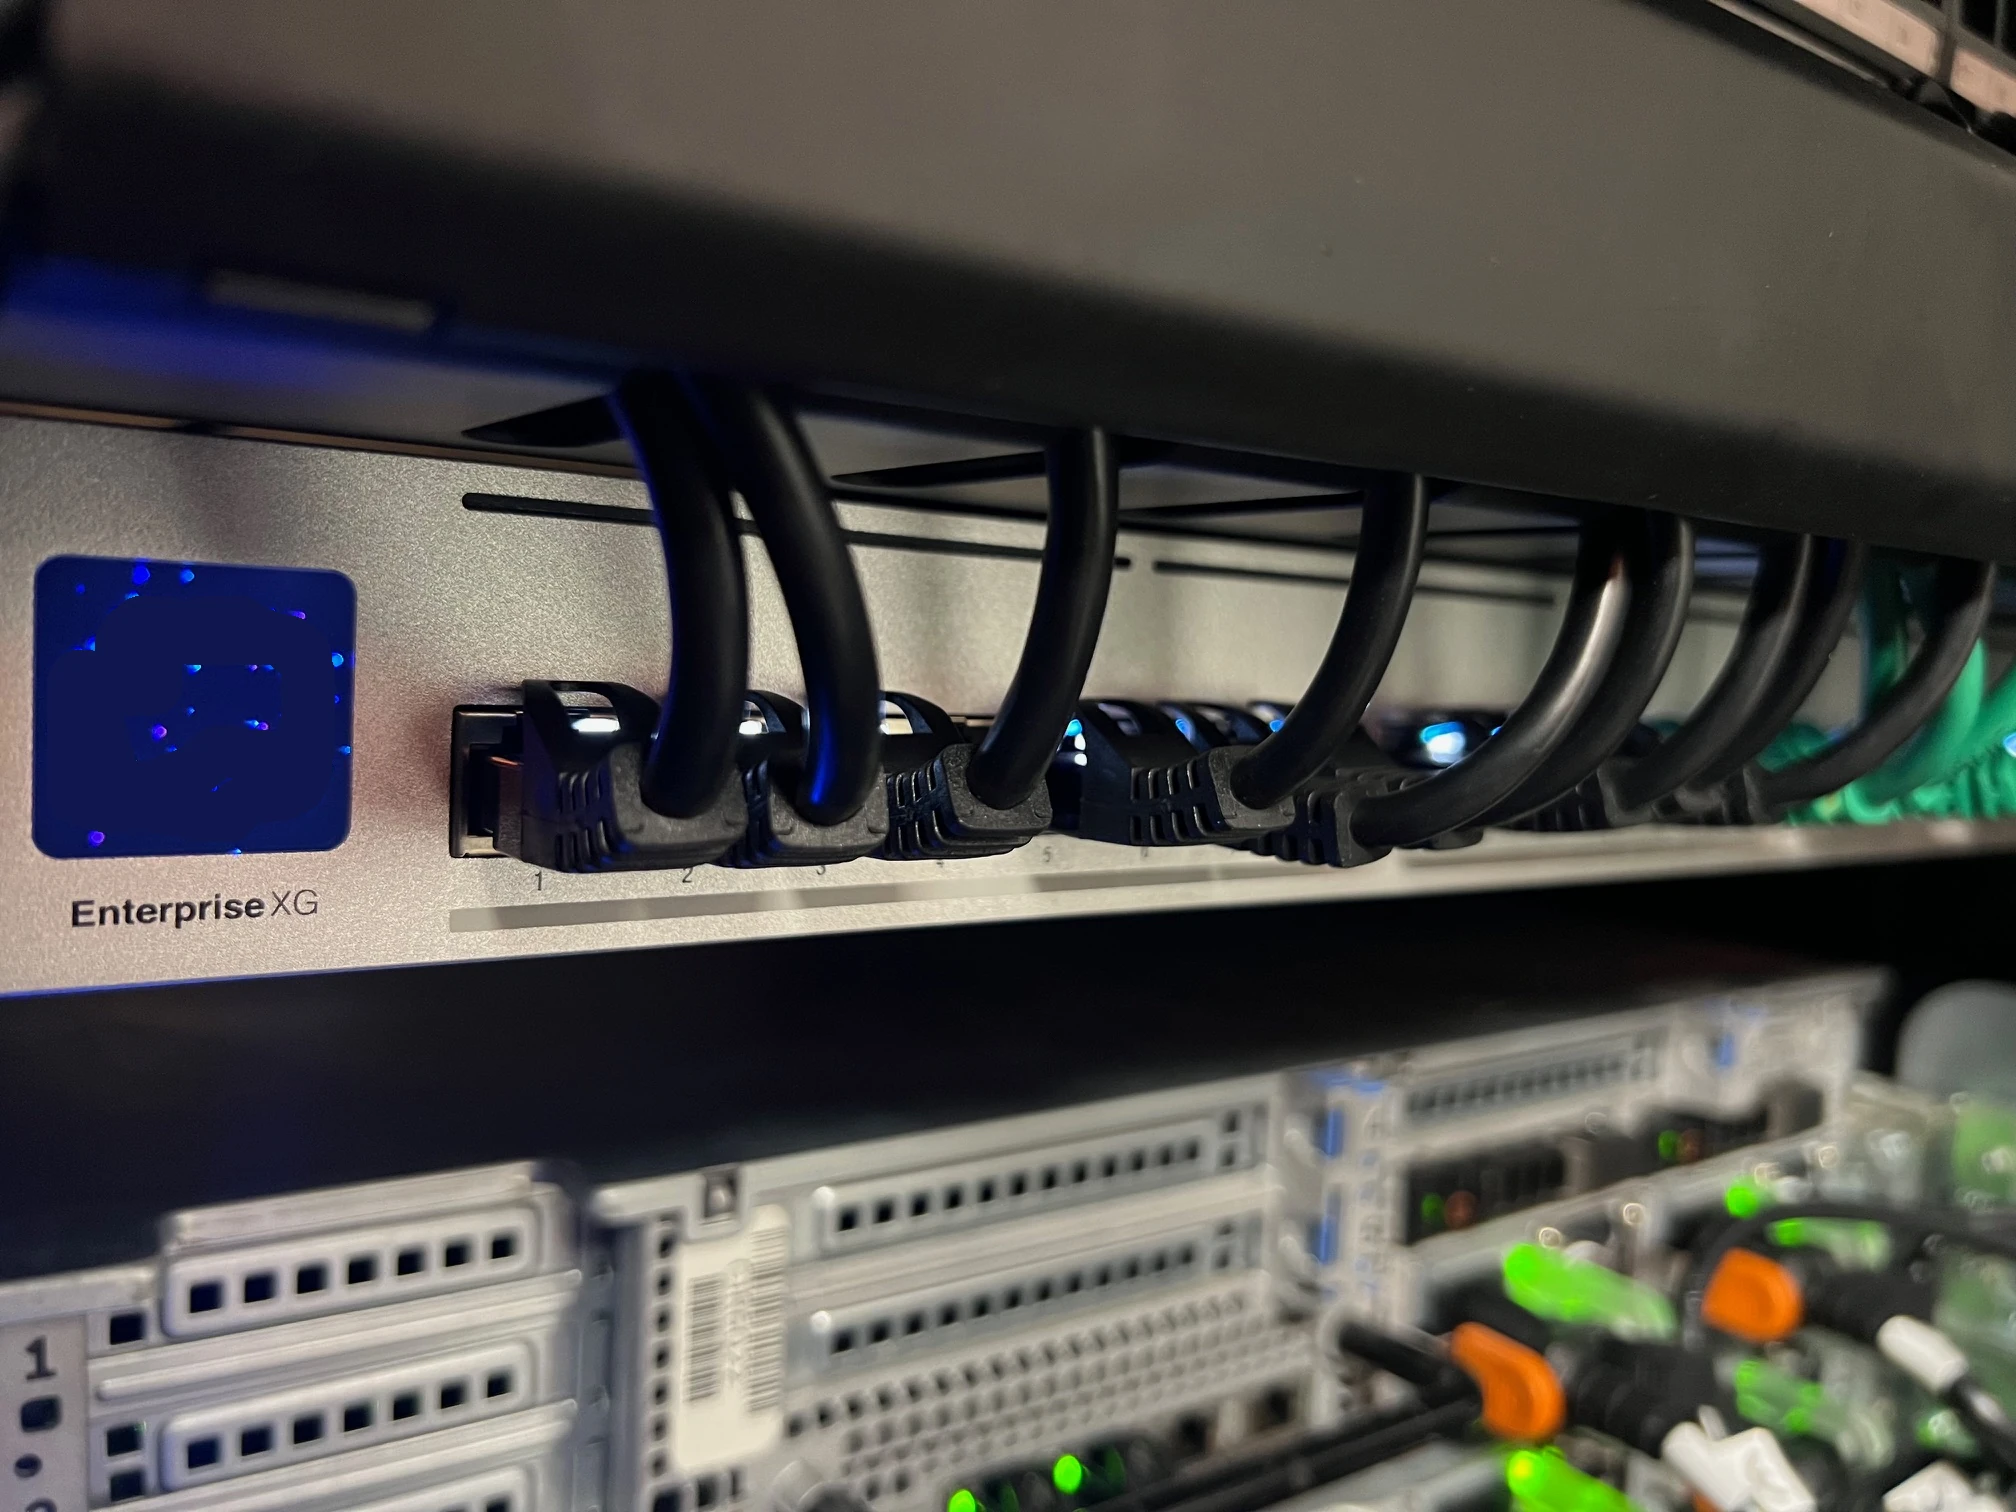 Like said before, for CEPH, we need at least a 10Gb switch. We like to use the Unifi Enterprise XG 24.
The UniFi Enterprise XG 24 is a highly capable switch that offers a variety of advanced features suitable for demanding network environments. It features 24 ports that support 1/2.5/5/10 GbE speeds and 2 additional 25G SFP28 ports. These specifications allow for a total non-blocking throughput of 290 Gbps and a switching capacity of 580 Gbps. The forwarding rate of the switch is 431.52 Mpps.
pfSense appliance
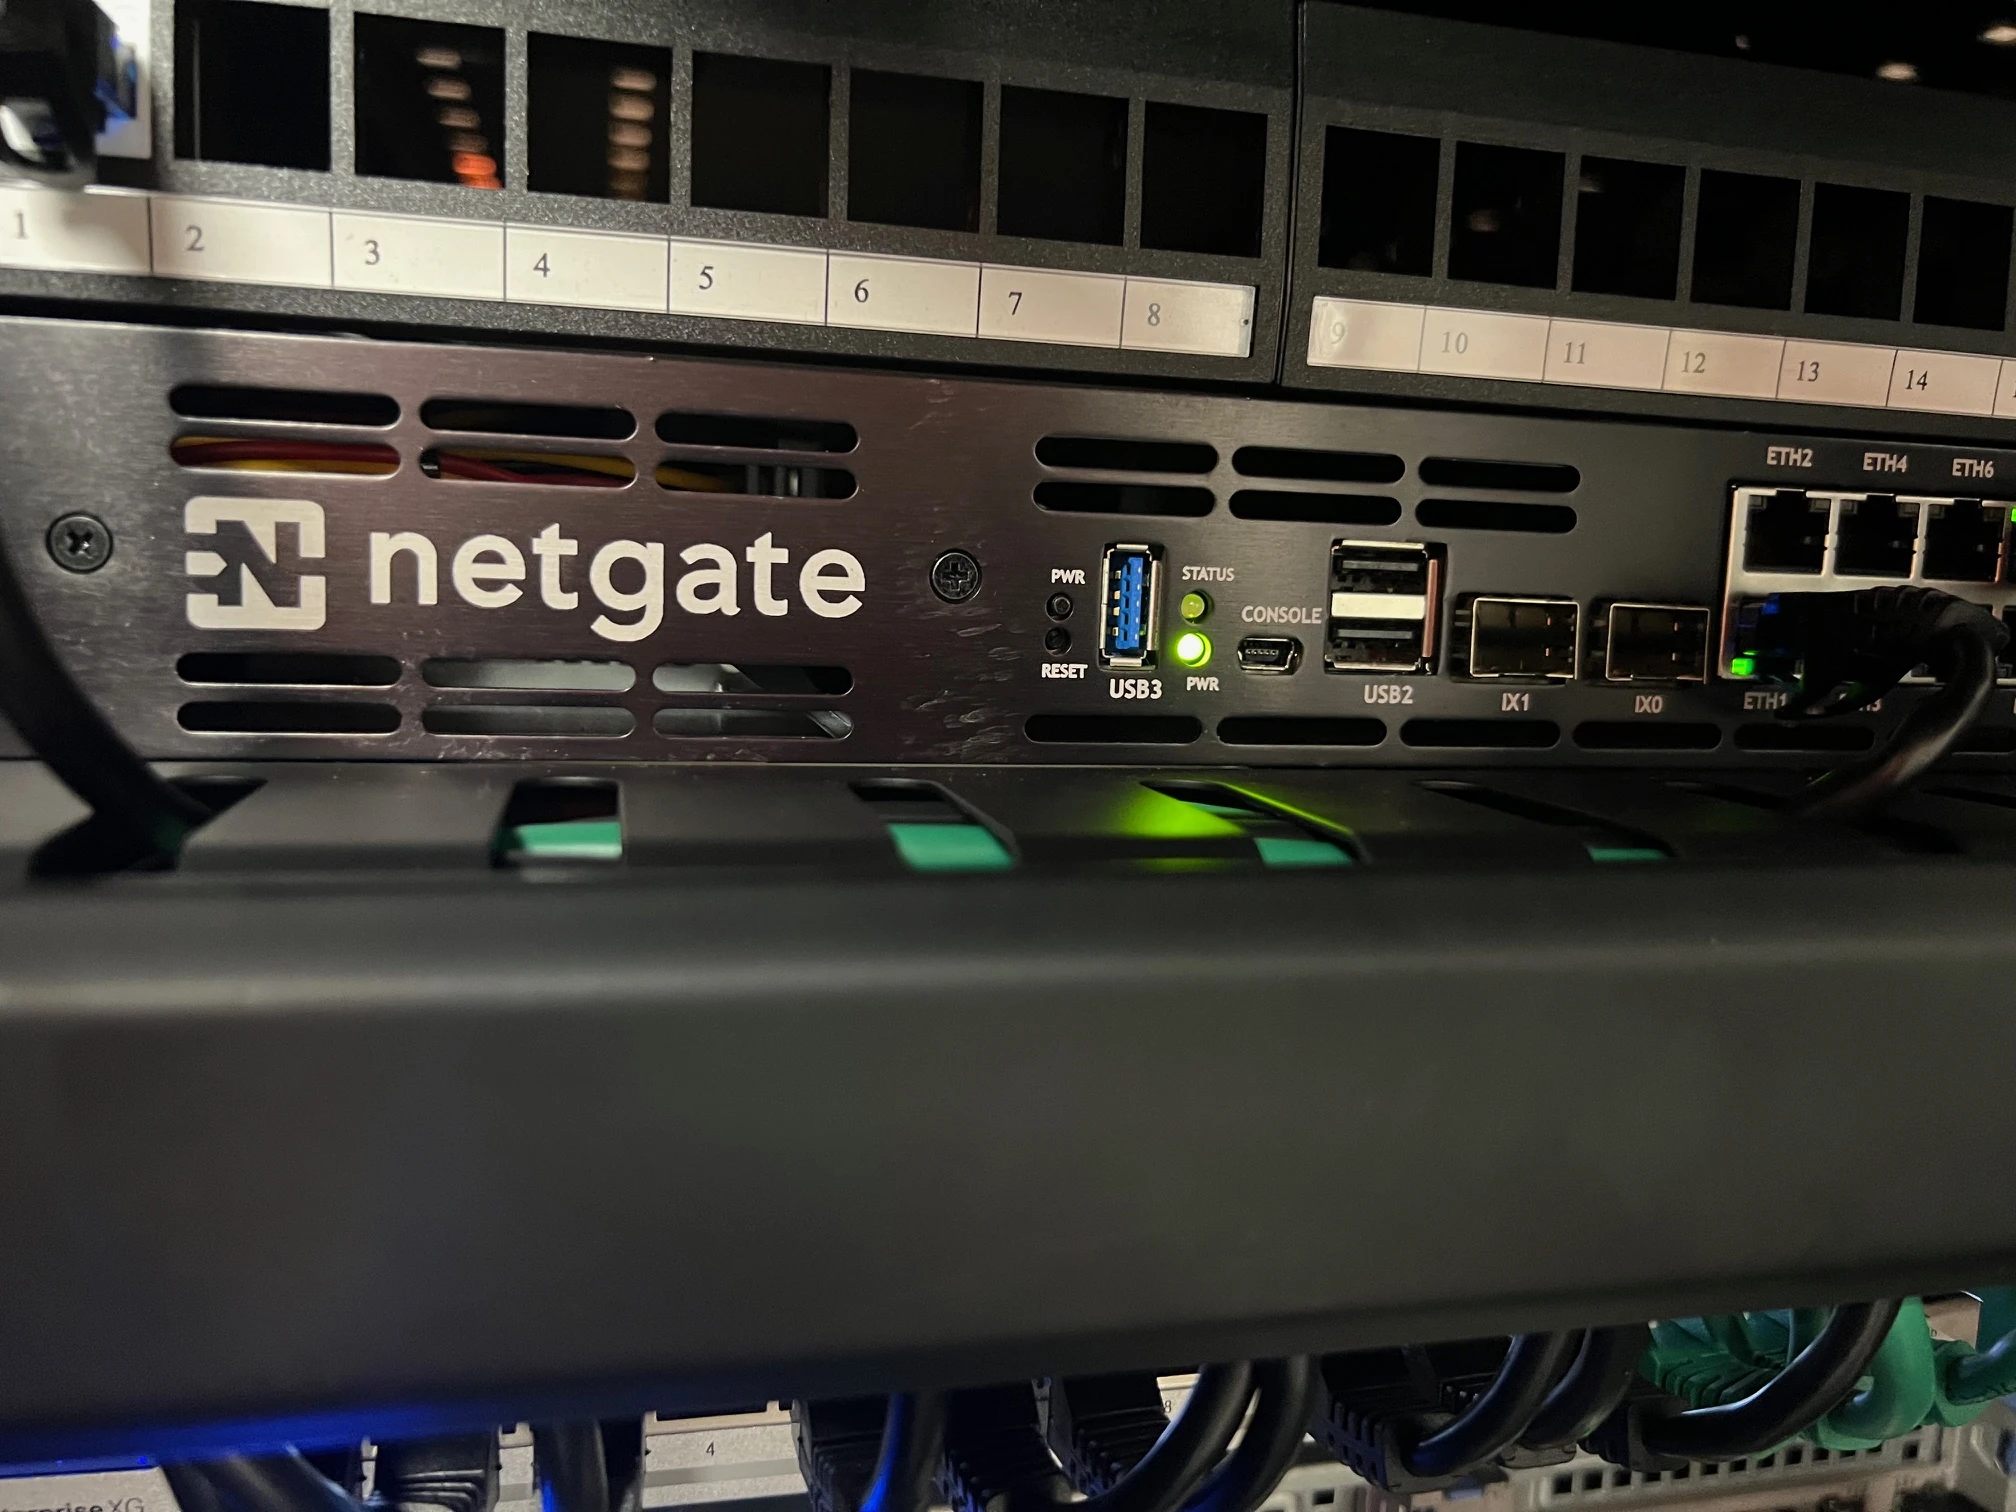 We prefer to use pfSense appliances in our network setups due to their reliability and rich feature set. pfSense provides an intuitive interface for managing a wide range of network tasks, from firewalling and VPN services to load balancing and traffic shaping. Its flexibility in handling complex routing protocols and network configurations makes it an indispensable tool for us, ensuring our deployments are both secure and highly customizable to meet specific client needs.
I hope this dive into our go-to Proxmox, pfSense, and TrueNAS configuration has provided you with a clear understanding of how these technologies can be combined to create a robust and efficient virtualization environment. We’ve refined our setup over many projects, aiming to strike a balance between performance, scalability, and ease of use. Whether you’re just starting out or looking to optimize an existing system, I encourage you to experiment with these solutions.
If you have any questions, or if you’d like to share your own experiences and tips, please feel free to comment below or reach out directly.